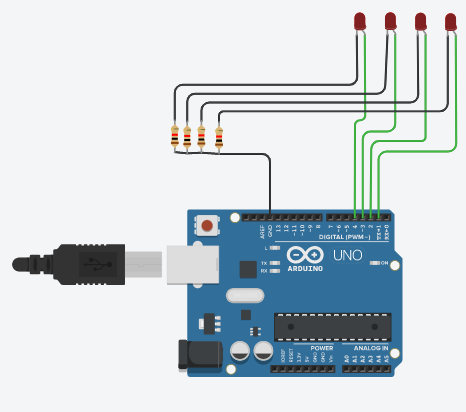
In this part we can do one more example on digital GPIO as output. Lets make an LED chaser with eight leds. As the firsts step we can wire up the circuit, my circuit is given below. The four leds are connected to digital GPIO pins 1,2,3 and 4.
LED chaser means, LED 1 has to turn on for some time, during this time other leds will be off. After some time, LED 2 gets turned on and others will turn off and this continues as a cycle.
Inorder to write the program for this application, first we have to write the hardware initialization. That is we need to set all these four pins as output. Then at the initial state, we can make all the leds off. We can write this also as the initialization code. Next we have to write the logic for chaser.
I wrote the code like below, simulated it and its working well.
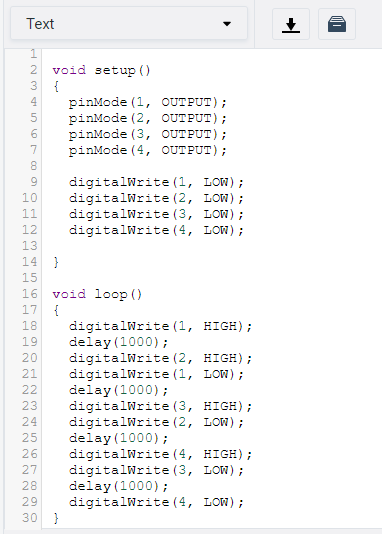
But looking at my code, it seems lengthy and is not readable. We can solve a problem in different ways, like this we can write the code for an application in different ways, there is no hard rule that you should write it this way. The below is the code for same application written in another way, using loop.
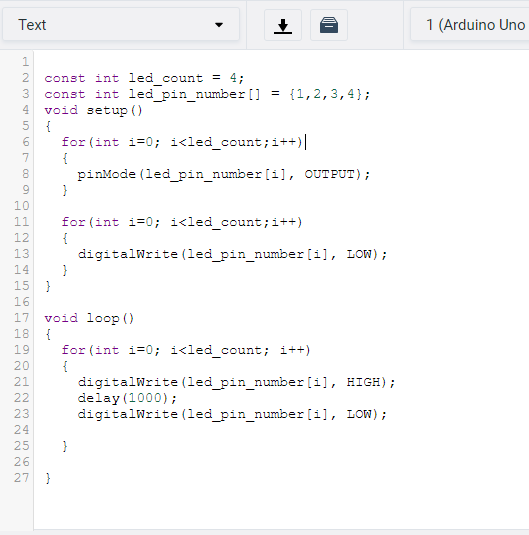
The above program seems good comparing to the previous program and the variable name we used are readable. The code length is less, it is more readable. One fine day, if you need to increase the count of leds from 4 to 8 or 10, there is no need to change the entire program, instead just, update the variable led_count and led_pin_number[].
Now comes another important thing, you are writing this code for a microcontroller, and the memory is limited. Saving each and every byte of memory is important.
I have compiled the above code in Arduino Online editor and after compilation i got the below response about the memory usage of the code.

As we can see, the code is using 3% of the available program memory and out of 2048 byte of data memory, 17 bytes are used for global variables. Now, we can change the data type of led_pincount and led_pin_number variables. The data that each variable hold are less than 255 and hence we can use an 8 bit data type. So, we can rewrite the code as below.
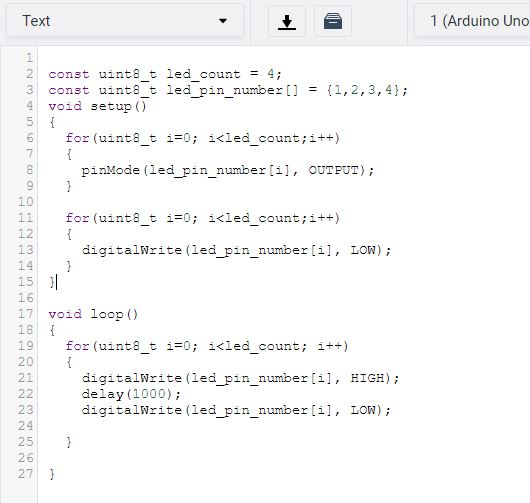
With the Online Arduino editor, we compiled the code and see the result below. Now the data memory utilization reduced to 13 bytes, instead of 17 in our previous code. A small change saved 4 byte.

I explained this to make you aware that, while writing a code for microcontroller, always think about the limited available resources.
note: the first lengthy code we have written is most data saving in this application. It is taking only 9 bytes.